Keep Your Parking Space: Secure Storage for Shared Garage Bays

The most practical, secure approach for shared garage storage is a lockable steel enclosure sized to fit your bay without blocking vehicle access, backed by unique access credentials and a written inventory. Before buying anything, measure your bay, get body corporate sign-off, and choose closed steel panels with a multi-point lock over cheaper alternatives.

The Short Version

  • Over-bonnet steel units are ideal for shared garages because they do not reduce parking space and are easy to install and remove.
  • Proper measurement, management approval, and detailed plans significantly speed up approval and reduce risks of rejection or damage.
  • Using unique access credentials, not shared codes, and monitoring entry logs enhances security among multiple residents.
  • Regular checks for rust, lock operation, and moisture buildup are essential to maintain long-term unit security and functionality.
  • The StorageNest Kookaburra over-bonnet system offers a lockable, removable storage solution that fits within existing regulations.
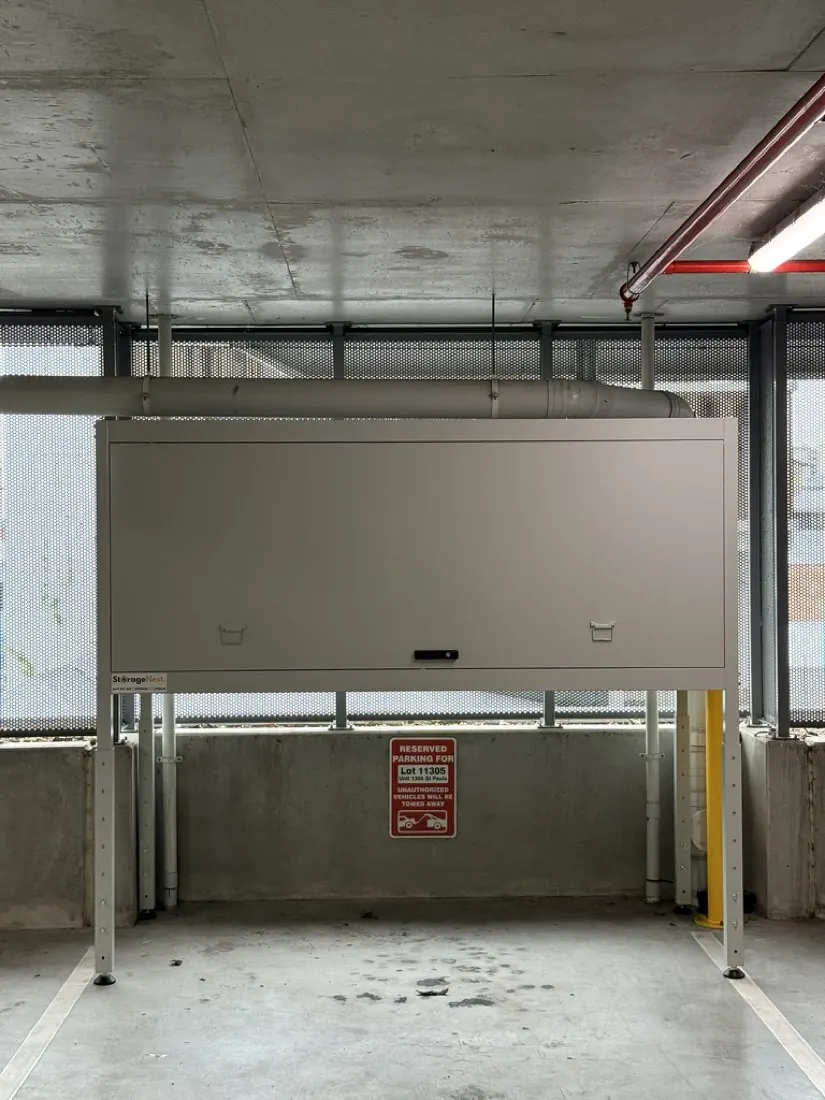
A closed Kookaburra over bonnet storage unit installed in an empty basement car park bay, with a reserved parking sign on the wall behind it
Closed and locked in a shared basement. Nothing is fixed to the building.

What are the best secure storage options for a shared garage?

Not every storage solution suits a shared bay. Space is tight, rules are strict, and whatever you install has to survive next to a car, a humid car park, and other people's belongings.

Freestanding lockable cabinets work well if you have spare floor space beside your car. They're affordable and easy to relocate, but a standard cabinet eats into your parking clearance and rarely survives long in a damp, unconditioned garage without a decent corrosion-resistant finish, a point backed by product testing on garage storage systems.

Wall-mounted lockers save floor space and keep gear off the ground, but they need a wall you're actually allowed to drill into, which many shared car parks don't offer.

Floor-anchored cages offer the strongest physical security of any option here, short of a proper enclosure. The catch is permanence. Bolting a cage to a shared slab usually needs structural sign-off, and it's not something you can take with you if you move.

Over-bonnet units solve the space problem directly. Mounted above the vehicle rather than beside it, they leave your parking footprint untouched. A properly sized over-bonnet enclosure gives you a lockable steel box that never competes with your car for room.

Ceiling or overhead racks use dead space too, but check the load rating and headroom carefully. Many shared garages have tight vertical clearance, and an overloaded overhead rack is a genuine safety issue, not just a storage inconvenience.

  • Freestanding cabinets: cheap, mobile, but eat floor space
  • Wall lockers: space-saving, need wall access approval
  • Floor cages: most secure, usually permanent
  • Over-bonnet units: zero footprint loss, full vehicle access retained
  • Overhead racks: use dead space, watch weight limits and clearance

How do you choose the right storage unit for your bay?

Getting this wrong means a unit that doesn't fit, gets rejected by management, or rusts out within a year. Work through these steps before you commit to anything.

  1. Measure your bay properly. Record bonnet clearance height, the width of the aisle behind you, and the vertical clearance to the ceiling or any sprinkler pipes.
  2. Check with your body corporate or landlord first. Ask specifically whether drilling into slabs or walls is permitted, whether a removable design is preferred, and if there are fire-hazard clearance rules for stored items.
  3. Run the material and lock checklist. Look for closed steel panels, concealed hinges and a multi-point locking system rather than a single padlock point.
  4. Confirm warranty and installation support. A unit backed by a genuine parts warranty and professional installation saves you from DIY guesswork on something bearing real weight.
  5. Set your budget tier. Entry-level cabinets sit at one end, purpose-built over-bonnet or caged systems at the other. Professional installation is worth paying for anything load-bearing or bolted near a vehicle.

Pro Tip: Photograph your bay from three angles (front, side, ceiling) before you contact any supplier or committee. It answers half their questions before they even ask.

Getting installation and body corporate approval sorted

Most disputes over garage storage come down to one thing: nobody asked first. A written submission avoids the argument entirely.

Include exact bay measurements, photos of the space, and a product spec sheet showing weight, material and mounting method. Committees respond faster to a removable, non-penetrative design than to anything involving drilling into structural elements, since a strata by-law breach is easier to avoid with gear that unbolts cleanly at move-out.

  • State the installation method clearly: adjustable legs vs. wall anchors vs. floor bolts
  • Note that the unit can be fully removed with no residual damage
  • Include a proposed removal procedure for when you vacate
  • Attach the manufacturer's spec sheet, not just a photo of the product

A professional installer will typically check bonnet clearance, floor levelness and aisle width on site before final positioning. For a purpose-built over-bonnet unit, that whole process runs in under two hours from arrival to lock-testing.

Daily habits that actually stop theft

A locked unit only works if the habits around it hold up. Layer your security rather than relying on one lock to do everything.

Think of it in three tiers: the garage door itself, the storage unit, and anything portable inside it, such as a toolbox. A layered approach matters because shared garages have far more entry points than a private one, and a single weak link (a jammed roller door, a shared code everyone's forgotten about) undoes the rest.

  • Use a laminated padlock rated for outdoor use, not a basic combination lock
  • Mark high-value items with UV pen or engraved ID numbers
  • Keep a simple photo inventory with serial numbers for insurance purposes
  • Add a motion-sensor light or discreet battery camera if your building rules allow it

Pro Tip: Photograph your inventory items sitting inside the unit, not just the items alone. It proves ownership and location if you ever need to make a claim.

Locking down access without annoying your neighbours

A shared code that everyone knows is barely security at all. Once five households have the same PIN, you've got no way of knowing who actually opened that door last Tuesday.

Push for unique PINs or fobs per resident instead of one shared code, and ask for temporary codes for tradespeople or removalists rather than handing out the permanent one. This kind of zero-trust access model gives every entry a name attached to it, which matters enormously when something goes missing and three people are pointing fingers.

  • Request unique credentials per resident, never a single shared code
  • Ask management to revoke access immediately at move-out
  • Push for access logs or app-based entry where the building supports it

Keeping your unit secure and rust-free long term

A quarterly five-minute check beats an expensive repair later. Test that both locks turn smoothly, check hinges for stiffness, and look for surface rust starting on panel edges or seams.

Garages swing between humid summers and cold nights, and that cycle is what breaks seals and corrodes cheap steel over time, a risk well documented in guidance on managing garage heat and moisture. Call your installer or building management if you spot a loose anchor point or a garage door that's sticking, rather than waiting for it to fail outright. For anything moisture-sensitive inside, silica gel packets and keeping items off the direct floor make a real difference.

Why an over-bonnet steel unit checks every box above

Everything covered so far, fit, finish, locking, approval, points toward one practical answer for apartment bays: a purpose-built over-bonnet unit. The Kookaburra from Storagenest is built around exactly this brief.

  • A strong load capacity, supported by a full steel frame rather than a lightweight shell
  • Closed steel panels with an electrocoated finish and a 3-point locking system
  • Removable, non-penetrative design with adjustable legs, no drilling into shared structure
  • Professional installation completed in under two hours
  • 5-year structural warranty, plus Lifetime Parts Cover for the original lock mechanism and gas struts

For apartment residents, the real win is footprint. Your parking bay stays fully usable, your car still fits underneath, and the unit itself gives management a straightforward, removable design to approve rather than a permanent modification to argue over.

What buyers usually realise once it's installed

Most people worry the unit will make parking awkward. In practice, the more common surprise is how easily body corporate approves a design that's clearly reversible.

Talk to your committee before you order, not after. Bring measurements and a spec sheet up front, and the conversation moves a lot faster than most residents expect.

— Matt

Get a fit check for your parking bay

If you've read this far, you already know the shortlist: lockable steel, a corrosion-resistant finish, unique access, and a design your body corporate won't fight you on. The Kookaburra over-bonnet unit from Storagenest ticks all four without costing you a single square metre of parking space, since it mounts above your bonnet rather than beside it.

Storagenest supports the approval process directly too, with ready documentation for your body corporate submission so you're not drafting one from scratch. Prefer not to buy outright? You can rent a unit from $25 a week instead. Either way, the next step is simple: request a fit check on the Kookaburra product page and get a straight answer on whether it suits your bay before you commit to anything.